
After Stonyfield Farms made the unfortunate decision to homogenize their organic yogurt, I was determined to try my hand at making my own. And since the only milk we buy and consume around here is raw milk, of course it was going to be raw milk yogurt.
I bought a nifty yogurt maker on Craigslist and some lovely yogurt starter from Cultures for Health. I was so excited! I envisioned my youngsters eating raw milk yogurt topped with fruit for breakfast, snacks and dessert.
Two totally failed attempts later, discouragement set in. I was already about $30 invested in this project with nothing to show for it. Ouch. Since kefir making is so easy and free, I had almost decided to just give up and let kefir be my main dairy probiotic food.
What I didn’t know yet was that making yogurt from raw milk without cooking it a little first (hence, making it not raw) was nearly impossible. Most people are unable to pull it off. Why? Because the naturally occurring enzymes, one of the things that makes raw milk so good for you, compete with the yogurt culture. The yogurt never sets.
After doing some more research, I was at least determined to heat my raw milk first. Even “cooked”, the finished product would be far superior to anything store bought. But I still wanted a simpler method.
I enjoy Christine’s blog, A Year of Slow Cooking. One day while perusing her recipes I found this on the sidebar: You Can Make Yogurt In Your Slow Cooker.
Bingo! Guess what I ate this morning?
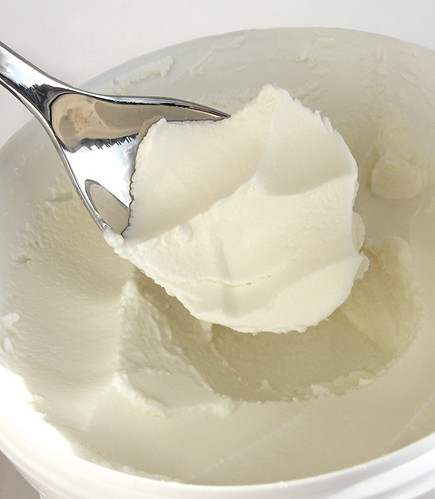
![]() photo credit: FotoosVanRobin
photo credit: FotoosVanRobin
A big huge bowl of raw milk yogurt, made in the slow cooker. Teehee.
It’s delicious, I think even tastier than store bought. I like the taste of plain, unflavored yogurt, but I’m sure the kids will want to add a little honey or fruit. It has a very mild, clean refreshing taste. Yum!
The only caveat is that the texture is a little runny. I think I need to keep the milk heated in the slow cooker a tad longer next time. If that doesn’t work, I’ll just add a packet of plain unflavored gelatin. I don’t mind the texture, it’s like drinkable yogurt, but I bet the kids would prefer it with a little more drag on the spoon. It was so easy too. And only one bowl to wash (the slow cooker crock).
I’ve calculated that making my own amounts to at least a 50% savings over store bought to boot. Because I despise “uni-tasking” appliances, I’m thrilled that I can now sell my yogurt maker.
If you’re interested in making raw milk yogurt (or pasteurized for that matter) in your slow cooker, be sure to check out Christine’s instructions. The comments have some useful info too.


Carrie,
Thanks for sharing. This is so interesting! We also do raw milk and I have been hesitant about making yoghurt with it. I don’t have a slow cooker… However I do have the slow cooking function on my oven. Any idea on how I would be doing this without a slow cooker? Any help would be appreciated.
I am sure it’s possible to culture it in the oven, I just don’t know the method. Maybe a google search would turn something up
I have made yogurt in the oven this way: I first warm the oven. I place the jars of cultured milk in a large pan of warm water, then place it in the oven, and turn it off. This seems to keep the yogurt warm enough, but not too warm, as would be the case if it were left on, even at the lowest temperature, which on my oven is 140 degrees.
Thank you for posting your raw milk version of this!
I am assuming, since the slow cooker his on low, you’re not actually “cooking” the milk (and therefore pasteurizing it), right?
My son can eat yogurt but can’t handle drinking anything except raw milk so this would be a GREAT way to save money and take another step at being more self-sufficient.
Do you set your slow cooker (crock pot) on Low. I saw a recipe like this before so I checked the temperature of my crock pot (same version as shown on the link) on Low and it reaches about 150 degrees (not exactly raw). I have not had success with all the raw recipes out there. So like you I figured what I was making would be better then store bought and went ahead and heated it. It resulted in a nice thick batch. Still wish I could find a way to make it thick and keep it raw. so if I am miss understanding please help and let me know. Thanks
Preheat oven to lowest temp then turn off.
Using a good amount of culture added to some raw milk in a stove top kettle, I whisk it quickly to disperse yogurt then add remaining milk. Whisking, I quickly bring the temp upto about 110.
Jar & cap and set in oven. If the house is chilly (wintertime) I may turn the oven on once more to the lowest setting, then immediately off again. Leaving the oven light on helps, too. 6 to 8 hours should do. I don’t use a waterbath. I try to keep temps as low as possible to preserve the nutrients.
Remove slightly before the whey develops, while the side of the jar is still milky with a just barely discernable gel to the yogurt.
This is my friend’s version. It is quite good. She strains hers to make greek yogurt and saves the whey for baking. I would suggest straining or at least draining the whey if you want thicker yogurt. The liquidy whey is just part of the process. It’s just how it turns out. If you let it sit a little longer, like a day, then you get a fabulous cream cheese type of consistency, which is great for a spread!
2. you do NOT need to heat the milk. this is the joy of this method and what makes it so very easy!
3. set your oven to 350 while you whisk in a scoop (maybe 2 or 3 T) of plain yogurt. I like to buy a little $1 greek yogurt container, you can use whatever you want depending on what cultures you want/like. After this batch is done, just scoop up some of your homemade to start the next batch. I can keep it going for a couple months, at least, making yogurt about every 6 – 8 days.
4. turn off your oven. it’s not 350 yet, you just want to take the chill off. turn ON your oven light. The light, believe it or not, will keep the oven at around 100 which is just right for yogurt. cover your milk mix with aluminum foil. put it in the oven with the light on and WALK AWAY. Do not open, jiggle stir, investigate. I usually do this after dinner or before bed or in the morning and leave it alone all day. Remember, this stuff was made in sacs hanging from camels traveling the desert; you can’t hurt it by going too long;) [The goal is about 100degrees. I did use my probe thermometer at first to make sure my oven would hold to this temp]
5. after about 10 hours, take the bowl out and admire all that whey floating on top. You did it!
6. That whey is full of calcium and has about 20% of the protein of the yogurt too (lots of debate on that, I went with what I found in dairy/yogurt textbooks). The bacteria ate all the carbs up, too and turned them into tangy goodness. You probably know all that already:) . If you want, stir the whey in and enjoy gloopy yogurt. I don’t like that so much:) I save the whey and use it for liquid in bread baking. you can use it in anything you bake, really, as a water substitute. So I strain it the EASY WAY. Line you handy dandy generic pasta colander with a flat cloth diaper–not the prefold kind with a thick middle, but the flat birdseye kind (or 2 layers of bounty paper towels, but the diaper is much easier, and cheese cloth? BIG MESS. skip it!). Put colander over a pot or bowl it will not sink down into (I use by 4c liquid measuring cup). Pour the yogurt into the colander and let it hang out and drip. I usually let 2-3 cups whey drain out, depending on how thick I want it. It takes less than an hour. To speed it up, add a cup of water to a quart ziplock and throw it on top. it won’t stick, and it will add weight to speed things along. Sometimes I run a rubber scraper along the diaper/paper towels liner to get the thick stuff off and keep things draining. If you want a sour cream or cream cheese substitute, stick it in the fridge and let 4 c drain (the max I’ve ever seen). When done draining, take the yogurt from the diaper and pour/scrape into a container for the fridge. This can feel awkward, but you’ll get the hang of it. most of it pours off, and the rest comes off the diaper quite nicely with a rubber scraper. stir and enjoy! mix in anything you want when you serve.
I make home-made yogurt as well. I like the crock pot method the best. But just want to add that since eating plain yogurt for 3 times a day for 3 months, I’ve lost 6 lbs without doing anything else. So it’s a natural weight loss solution as well:)
I was wondering… last week I made yogurt with raw milk on Sunday night (the milk was fresh on Tuesday). How long will the yogurt be good for? I had heated the milk to just bubbling so I’m not sure if this extends the life of the yogurt or if I need to make sure I make the yogurt right away when I get the fresh milk??
I don’t know a precise answer but I’ve stored it for two weeks in the fridge and it kept just fine
Thanks, Carrie!